Views: 0 Author: Site Editor Publish Time: 2026-08-03 Origin: Site

Yarn can run smoothly for hours, then start breaking repeatedly without an obvious change in the production line. The problem is rarely caused by one factor alone: weak sections, unstable tension, poor package unwinding, friction, or worn machine parts can all push the yarn beyond its breaking limit.
Understanding the main yarn breakage causes makes troubleshooting faster and more accurate. By checking where the break occurs, how the broken end looks, and whether the problem follows the yarn or the machine position, operators can narrow down the cause and avoid unnecessary adjustments.
Cause 1: Insufficient yarn strength or elongation. A yarn can fail even under apparently normal machine settings when its tensile strength is too low or it cannot elongate enough to absorb temporary load peaks. Average strength does not tell the whole story: a lot with wide strength variation may contain short weak sections that fail long before the rest of the yarn approaches its nominal breaking load. If breaks appear across several machines using the same lot, compare it with a normally running lot and review tensile strength and elongation results where available.
Cause 2: Thin places, unevenness, or weak splices. Many yarn breakage causes are local rather than continuous. A splice, piecing, or unusually thin section can become the point where ordinary processing tension turns into a break, even though most of the package performs normally. Examine several broken sections for changes in diameter, poor joints, or other irregularities instead of judging the lot from one isolated failure.
Cause 3: Incorrect twist or poor filament intermingling. Yarn needs enough structural cohesion to pass through downstream equipment without fibers or filaments separating under repeated movement. Too little cohesion can encourage filament spreading and snagging, while excessive or unstable twist may create liveliness and erratic feeding rather than simply increasing strength. In multifilament yarns, the combination of twist, filament cohesion, and surface friction has a direct effect on how well the yarn tolerates repeated contact during processing.
Cause 4: Hairiness, fuzz, or broken filaments. Surface damage often develops progressively. Protruding fibers or separated filaments make more contact with guides and other yarns, increasing abrasion until the remaining structure can no longer carry the load. Compare the yarn surface before and after major contact points; lint buildup, frayed surfaces, or increasing filament damage downstream can show whether the defect arrived with the package or was created inside the machine.
Cause 5: Unstable unwinding or inconsistent yarn condition. A yarn with acceptable strength can still break if its package creates sudden resistance during off-winding. Hard or soft package zones, trapped coils, damaged cones, sloughing loops, static, or inconsistent surface finish can all turn smooth feeding into repeated tension peaks. Package build becomes particularly important as machine speed rises because filament snagging during off-wind can quickly create tension spikes and production stoppages.
A simple isolation test is to pull yarn from the package and observe whether resistance changes noticeably, then replace the package without altering the machine settings. Check cone alignment and unwinding direction as well. If the breakage pattern varies by package age, storage condition, shift, or environmental condition, conditioning and static control deserve attention before major machine adjustments.
Cause 6: Excessive or unstable yarn tension. High steady tension reduces the safety margin between normal operating load and yarn breaking strength, while short peaks can expose weak sections that would otherwise survive. Those peaks may occur during start-up, acceleration, feeding, shedding, or changing package unwinding conditions. In high-speed knitting and weaving, friction and feed-tension control become increasingly important because rising resistance can push operating tension closer to the yarn's breaking limit.
Do not simply loosen every tension setting until breaks disappear. Excessively low tension can create unstable feeding, poor loop formation, shedding problems, or fabric variation. Measure tension where practical, compare the affected position with normally running positions, and note whether failures occur during steady production or mainly during transitions.
Cause 7: Excessive friction from worn, dirty, or damaged components. Every eyelet, guide, ceramic surface, tensioner, feeder, heddle, and reed adds another contact point along the yarn path. A small groove, deposit, rough edge, or burr may repeatedly scrape the yarn until filaments or surface fibers are damaged. Repeated abrasion against yarn-contact components gradually reduces the yarn's ability to withstand normal processing loads.
The broken end often provides a clue: fuzzy or abraded ends suggest progressive surface damage rather than a clean tensile failure. Follow the entire yarn path instead of inspecting only the component nearest the final break. Clean deposits and replace visibly damaged contact parts rather than permanently compensating with reduced production speed.
Cause 8: Damaged or misaligned machine elements. In knitting, needles, hooks, feeders, and guide alignment should be checked when breaks remain concentrated at one position. In weaving, the equivalent investigation includes heddles, reed dents, drop wires, and the local warp path. If several different packages continue breaking at the same machine position, the location itself becomes stronger evidence than the yarn lot.
Cause 9: Incorrect threading, creeling, or feed geometry. A skipped guide, crossed yarn, sharp change of direction, poorly positioned cone, or yarn rubbing against another package introduces resistance that the intended machine path was designed to avoid. Each additional contact point contributes to the total friction acting on the moving yarn, so several minor routing errors can combine into a significant tension increase. Re-thread the position correctly, reduce unnecessary sharp bends, and confirm that the package can unwind without touching surrounding structures.
Cause 10: Speed and acceleration are too aggressive for the yarn-process combination. Production speed does not usually act alone as a root cause; instead, it magnifies weaknesses already present in tension control, friction, package unwinding, yarn cohesion, or alignment. A yarn may therefore run reliably at moderate speed but begin breaking after acceleration because dynamic loading and contact forces have increased.
Reduce speed temporarily as a diagnostic test rather than accepting slower operation as the permanent solution. If breakage falls sharply, identify which underlying variable becomes unstable as speed rises. Breaks concentrated during start-up or acceleration should also be investigated separately from random failures that continue during steady running.
The fastest way to separate many yarn breakage causes is to ask what the problem follows. If the same package or yarn lot produces breaks at several comparable machine positions, investigate yarn properties, package build, surface finish, and conditioning first. If different packages repeatedly fail at one position, the machine, tension device, threading path, or contact surface becomes the more likely source.
Process location adds another layer of evidence. A cluster of warp breaks in one area may point toward localized tension, abrasion, alignment, or sizing issues, while repeated failures at one knitting feeder direct attention toward the feeder, needle, and guide path. Widespread random failures across otherwise well-running positions make material consistency more suspicious than a single mechanical defect.
The break itself can narrow the search further. A fuzzy end suggests abrasion; a failure immediately beside a thin section suggests unevenness or a weak joint; loops or tangled yarn point toward unstable off-winding or threading. Repeated failure around the same guide, needle, heddle, or reed makes that contact area worth inspecting closely.
Do not diagnose the line from one broken end. Collect several examples and look for the pattern that appears most consistently. This turns break inspection from guesswork into a simple root-cause screen.
Break Pattern | Likely Area to Check First | First Action |
Same yarn lot breaks at several positions | Yarn or package | Compare with another lot |
One position breaks with different packages | Machine or yarn path | Inspect local contact points |
Broken ends are repeatedly frayed | Abrasion | Check guides and machine surfaces |
Loops or sudden snags appear before failure | Package or feed path | Check unwinding and threading |
Breakage rises sharply with speed | Tension or friction | Run a controlled speed test |
A disciplined troubleshooting sequence prevents a small problem from turning into a full-line adjustment. Start with observations and reversible checks before changing production parameters:
1. Record the machine position, yarn lot, operating speed, and point in the production cycle where the break occurred.
2. Inspect the package, broken end, and yarn surface.
3. Trace the complete yarn path for tangles, deposits, sharp angles, and rough contact points.
4. Inspect the machine component closest to repeated failure locations.
5. Measure or compare yarn tension with a normally running position.
6. Swap the package while leaving the remaining settings unchanged.
These steps address the most common yarn breakage causes while preserving useful evidence. If operators immediately adjust several parameters, they may make the machine run again without ever discovering which parameter was responsible.
Controlled comparison is more valuable than simultaneous correction. When the package is suspected, install another package while keeping the same position, speed, and tension settings; when the machine position is suspected, run a comparable package through that position. A suspected speed effect can be tested with a temporary reduction while leaving the yarn and tension unchanged.
Record break frequency before and after each change whenever production conditions allow. Avoid altering yarn, speed, tension, environment, and machine components together. Once a change reduces failures, confirm it during a normal production run so a temporary improvement is not mistaken for a permanent correction.
Incoming yarn selection should consider more than nominal denier or yarn type. Strength and elongation consistency, evenness, weak spots, twist or filament cohesion, package construction, off-winding behavior, surface finish, and linear density all influence downstream performance. Durable polyester filament yarns also come in different constructions, including POY, DTY, FDY, ITY, CEY, and related forms, so yarn selection should start with the processing route and end use rather than assuming all filament yarns behave identically.
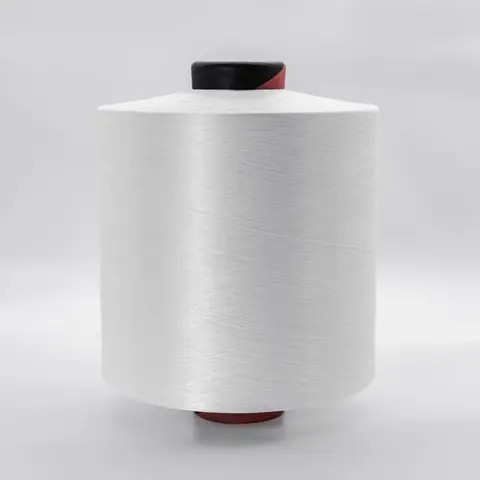
For well-intermingled polyester DTY yarn used in knitting, warping, or weaving, practical procurement checks include stable package unwinding, consistent package performance, suitable antistatic and lubricating finish, and appropriate denier. Nextile DTY is available across a broad denier range and is designed for applications where controlled unwinding and filament cohesion support downstream processing. These characteristics can contribute to more stable production, but suitable yarn cannot compensate for a damaged guide, excessive machine tension, or incorrect threading.
Reducing yarn breakage starts with separating yarn-related problems from machine-related ones. Strength variation, poor unwinding, excessive tension, friction, misalignment, and unsuitable operating speeds can produce similar symptoms, so checking the failure pattern before changing settings saves time and prevents unnecessary adjustments.
For mills working with polyester filament yarns, consistent yarn construction and package performance also matter. Shanghai Nextile Fiber Technology Co. Ltd. supplies polyester filament yarn options for knitting and weaving applications, helping manufacturers select yarn specifications that support smoother processing, fewer interruptions, and more stable production.
A: Common causes include low yarn strength, thin places, poor splices, unstable tension, excessive friction, damaged machine parts, incorrect threading, poor package unwinding, and excessive production speed.
A: A yarn may have adequate average strength but still contain weak sections or experience sudden tension peaks, abrasion, poor unwinding, or friction that exceeds its local breaking strength.
A: If breaks follow the same yarn lot across several positions, suspect the yarn or package. If different packages fail at one position, inspect the machine and yarn path.
A: Yes. Excessive tension reduces the margin between operating load and breaking strength, while short tension spikes during feeding, acceleration, or unwinding can cause weak sections to fail suddenly.
A: Check yarn quality, package unwinding, tension, threading, guides, needles, heddles, and reeds systematically. Change one variable at a time and confirm the result under normal production conditions.